
Here is a step by step guide on how to reassemble and disassemble your printer. Follow it thoroughly and enjoy the process.
Want to Disassemble & Reassemble Printers at Home? This article is going to be the most beneficial for you then.
In this article, today, we will help printer users with a perfect guide that will help them reassemble and disassemble their printer cartridges by themselves in the one-go. If you also want the same and are looking for some technical person to help you fulfill this process, then you needn't hire any technical professional. Following some simple and basic steps, you will be able to disassemble and resalable the printer.
All you need to do is follow the steps carefully! And bear in mind you don’t harm the printer's other components such as quality toners, cartridges, inks, and drum units while fulfilling the process.
Hopefully, you do the same and have a happy and efficient printer’s reassembling and disassembling.
Table Of Contents
- A step-by-step guide to resalable & disassemble is as following
- 7 Steps to Disassemble the printer
- 7 Steps to reassemble the printer
- Final words
A step-by-step guide to resalable & disassemble is as following
7 Steps to Disassemble the printer
This step by step guide is to disassemble the hp printer. If you are using an HP printer at your home, then this guide is going to help you a lot!
- Step 1
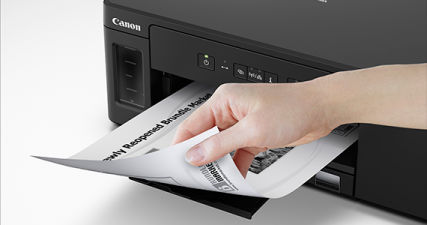
First of all, uplift the Deskjet's top cover and wait for the ink or toner cartridge position to slide out from the left-hand side. Extract the two ink cartridge covers and then gently remove the ink or toner cartridges whatsoever you are using and are compatible with your printer.
- Step 2
In the next step, leave the topmost cover open and unplug the power cable. Also, disconnect the USB cable. Place the 4 locking bolts on the top-left & top-right sides of the Deskjet.
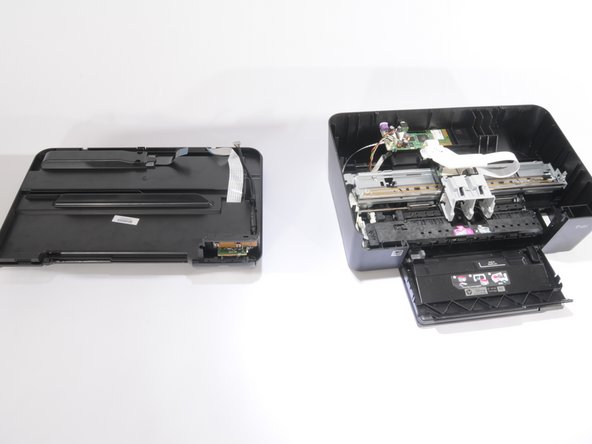
- Step 3
After that, separate the screws with a screwdriver and extract the top half of the case off the printer. Be sure you remove the screw on the left side of the control panel and gently draw the panel off the printer.
- Step 4
Place the tiny, plastic ink absorber at the bottom of the printer. Extract the absorber toward you and elevate it out of the Deskjet.
- Step 5
Remove the bolt clinging the PCB, printed circuit board at the right edge of the Deskjet. Carefully, pull out the circuit board of the printer.
- Step 6
Lately, remove the bolts at both the left and right ends of the ink and toner cartridge and pull the cartridge out of the printer. Change the printer position so the back end is facing you.
- Step 7
At last, force in the visible plastic latches gently and pull the top and bottom halves of the plastic casing and finish disassembling the Deskjet printer.
7 Steps to reassemble the printer
The reassembling process of the hp printer takes about 30 minutes. Here is a brief of what you need beforehand.
- An HP printer
- A4 sheet
- Cartridges
- A laptop or other connecting device
- A cable if you have a printer without WiFi.
- Step 1
Prepare your printer - Before you start reassembling your canon ink printer, make sure you unpack your printer, and it is free of any shielding material.
- Step 2
Install the cartridges - Installing the cartridges is somewhat simple and easy, but the process has to be performed correctly. First of all, uplift the top cover of the printer. Use the handles to lift it. Then, remove the cartridges from the packaging and be sure you have located the right color in the right place. Carefully remove the orange-colored sticker from the cartridge and lightly push the cartridge into the holder till you listen to a click sound. Bear in mind that the model number & label face upwards. Fold the cover when you've injected all the cartridges and this way, you are ready to move ahead.
- Step 3
Choose a connection method - Go to the WiFi icon on your printer and to 'Settings'. if your printer is wireless. From there, choose the Wireless Installation Wizard and follow all the on-screen instructions carefully. Establishing to secure a network can take up a couple of minutes. You can also prefer to connect the printer to WiFi later in the resembling process. The choice will be entirely yours!
On the other hand, if you want to connect the printer to your computer or laptop without using the internet connection, you are free to use a USB cable. Just plug the flat USB connector (USB-A) into your computer and plug the square USB connector (USB-B) into your printer. It's as simple as that!!
- Step 4
Download the software on your computer or laptop - Now, when you have established a secure connection, we can assure that your computer can control the printer. By downloading the EasyStart software from HP on your laptop, you can ease the reassembling process.
- Step 5
Open HP Easystart file - After downloading the file, Open it. If you are using a printer that is compatible with HP Instant Ink, then the program will ask you whether you want to use your trial period or not? if you wish to use it, then enter your details carefully. if you don't want a trial period or do you already have, then move to the next step.
- Step 6
Reassembling process - Bow, when you have installed the important software and drivers for your printer's smooth functionality, it's time to look for the secured wifi connection. Look up your WiFi code or grab a network cable. After this, your printer will be connected to your printer and you can start printing.
- Step 7
Shut down the printer - It's essential to shut down the printer when you're finished printing.

Final words
Well, these are the steps to reassemble and disable the printer at home. If you implement the steps carefully, then believe us, you will surely don’t get any obstacle in your way. However, if you miss one of these steps, then you can put yourself into trouble. So, if you want everything perfect, then make sure you take care of everything in detail.
Rest, if you have any issue and want to know something more about the printer’s reassembling and disassembling process, then feel free to ask us. We are here to help you out!
Enjoy reading & have a good day!!
===========================
 1641
1641


*********ren1990@gmail.com
Having expertise in printer maintenance, I emphasize caution and precision when disassembling and reassembling printers at home. Follow manufacturer guidelines meticulously, keeping track of parts and pvc card printer connections. Proper handling and cleanliness prevent damage and ensure functionality. This guide empowers users to troubleshoot and maintain their printers effectively, saving time and resources.