

For a complete printer, installation requires printer setup and software. Download and Install the123.hp.com/setup software for printer setup. Also, setup printer with windows, MAC, smartphones, and iOS with printer manual.
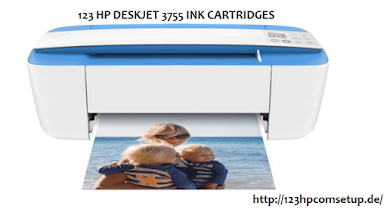
Your printer just requires a Black Cartridge and a three-shading cartridge dependent on colors, to print effectively on different kinds of paper. Presently your HP 3755 Ink Cartridges have a more drawn out span and are financially savvy. Try not to introduce relaxed or jolted cartridges. Still utilize your New HP Ink Cartridge to keep the defensive cover whole.
Switch off the force from your HP DeskJet 3755 and stand by until you test the print carriage to sit inert in the center. To store it on your printer, pull the Cartridge access entryway down in clockwise design. Presently open the tab of the cartridge and press down to separate the unfilled Ink Cartridge. Open New Ink Cartridge cover and afterward attempt to totally disengage the plastic folds for reinstallation. Presently slide the New Ink Cartridge inside its individual cartridge space to utilize the tab to bolt it. Push upward to close the Cartridge access entryway in an enemy of clockwise way. Presently click On for printing.
Single Cartridge Mode DeskJet 3755:
The DeskJet printer is least furnished to work with a solitary Ink cartridge. This is a programmed mode that takes impact any time an Ink Cartridge gets unfilled or uninstalled. The print work on DeskJet 3755 can be dealt with utilizing the printer program. To exit from rest mode you will recharge all vacant Ink Cartridges with the Latest HP Ink Cartridges. Read More>
You might also like:-HP DESKJET 3755 TROUBLESHOOTING
The hardware setup of your HP printer
- Before you start the 123.hp.com/setup network configuration and download and install the printer driver, you must first set up your hardware
- Complete the HP printer. Start by unpacking your printer. You will need to remove all tape and packing materials from your printer.
- Next, you need to place your printer on a level surface and within range of the wireless network.
- Then, unplug the power cord that came with the printer, and plug one end into the printer and the other into the electrical outlet.
- Then you need to turn on your printer by pressing the power button. Once your printer is on, you can set your preferences.
- For example, date, time, location, etc. Also, load the papers in the paper tray. Install the ink cartridge at the same time.
Are you plugging your HP printer into the network connection?
Wireless network configuration:
- For the network configuration you must first switch on your printer. Its power light must shine.
- Then click the Wireless icon located on the printer control panel.
- After that you need the option; Settings ”; tap for the tooth shape
- Also select the options Wireless Settings>; Wireless Network Setup Wizard.
- Your printer will now start searching for the wireless networks around you.
- Then you need to choose your preferred network from the list that appears on your screen.
- Then enter the password for successfully connecting to the wireless network.
- Once the connection has been successfully established, a completion message will appear on your screen.
Wired configuration:
You can also use the Ethernet cable to establish the connection between the printer and the router. To do this, you need to connect one end of the cable to the router and the other end to your printer.
 1488
1488