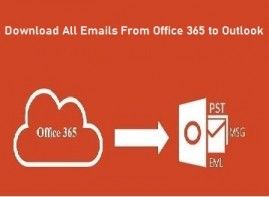
Learn how to use manual methods or third-party tools to export Microsoft 365 mailboxes to PST format.
Learn how to use manual methods or third-party tools to export Microsoft 365 mailboxes to PST format. Here, I will explain two ways to backup O365 mailboxes, so follow all the solutions step by step.
Reasons to export Microsoft 365 Mailbox to PST
Sometimes you need to create a Microsoft 365 export just because Exchange Online provides limited space for each mailbox. Additionally, most organizations want to regularly back up their mailboxes to create additional copies of important corporate email messages.
Here, I will discuss all possible ways to export Microsoft mailbox data into PST format. Therefore, please follow all instructions provided.
Method 1: Create a Microsoft 365 Export Using eDisocvery Tool
If you want to manually export Microsoft 365 mailbox to PST format, then you need to use the eDiscovery tool, which is a free integrated solution provided by Microsoft itself.
You can follow all the steps below to create o365 Exchange Online mailbox data (such as emails, contacts, calendars, appointments, and attachments) as a backup in PST format.
- Step 1: Log into your Microsoft 365 administrator account, then click "Admin Center" and select the "Security & Compliance" option.
- Step 2: In the "Security and Compliance" window, click "Permissions" and then select eDiscovery Manager. After that, a pop-up window will appear on the screen, so go to eDiscovery Administrator and click "Edit".
- Step 3: Now, select the members by clicking to select eDiscovery Manager and selecting Add >> Add >> Finish >> Save.
- Step 4: After creating the case, go to Search and Investigation Options >> eDiscovery in Create Case. Then type in the case name and description >> save.
- Step 5: Once the case is created, open it, then search for and edit it. Now, check Exchange Email >> Save >> Save and Run.
- Step 6: After that, a new window will open on your screen, so type in the job name and description and save. Now click on More and choose Export Results.
- Step 7: When finished, a new pop-up window will appear, then select the option and click Export.
- Step 8: When the operation is done, a window will pop up on the screen, then export and open the backup file. Now click Copy to Clipboard >> Download Results, then install the eDiscovery export tool on your PC.
- Step 9: Finally, just open the installed eDiscovert export tool, place the copied key and browse to the path where you want to save the Exchange Online Backup file.
Method 2: Use a Third-party tool to Export Microsoft 365 Mailboxes
Most people like to use third-party software to export Microsoft 365 mailboxes to PST because it is simple, fast, and accurate. Therefore, here I will also recommend you SysTools Office 365 export tool to export Microsoft 365 account data (such as emails, contacts, calendars, appointments, and attachments) to PST or other formats (such as EML, MSG).
Steps to export Microsoft 365 mailbox data:
1. Visit the official website to download the software and install it on your system.
2. Once the installation is finished, click on ‘Is Admin’ and enter the Microsoft 365 Admin credentials for login.
Note: If you are a user who wants to export its own mailbox, then simply enter your user account id and password for login into the tool without clicking on the ‘Is Admin’ checkbox.
3. Once the login is finished, you will get the list of users whose mailbox can be exported. Select the user accounts for export and click on Next. (This option will not appear if login without admin account)

4. Now, select the email-format as “PST” and set the split pst filter if necessary.
5. From category filter option, select the category of items to export from Microsoft account. Also, set the date-range filter for selected category.
6. Browse the location where you wish to store the exported Microsoft mailbox in PST file.

7. Finally, click on “Start” button to initiate the export process. And, once the process is done, click on “Download Report” and then exit the migration

Why Choose Automated Third-Party Tool?
There are many reasons why one should prefer the automated tool over the manual solution. Read the below-listed features of the tool to get a better idea:
-
Easy to use and export Microsoft mailbox to PST, EML, MSG formats.
-
Provides category and date-range filters for selective data export.
-
Doesn’t require technical knowledge for execution
-
Export archive mailbox of each user easily
-
Export shared mailboxes from Microsoft 365 using Admin account
-
Directly store the exported file in local or external drive
-
Provides complete export report to review successfully exported data.
Final words
In this article, I explained how to export Microsoft 365 mailboxes to PST format. Here, I have also discussed two possible methods of downloading O365 data in PST format. If you still have questions, please leave a message in the comment box. I will be happy to serve you.


