
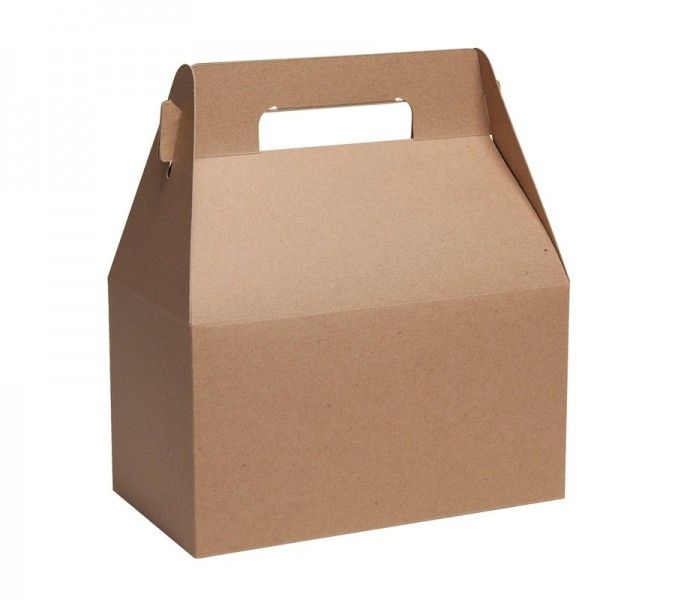
Gable packaging is one of the most unique and stylish packaging types we know. Gable boxes are what we encounter on a daily or very frequent basis and we always adore them and praise them for their fine finish and their different treatments.
Gable packaging is one of the most unique and stylish packaging types we know. Gable boxes are what we encounter on a daily or very frequent basis and we always adore them and praise them for their fine finish and their different treatments.
From marriage or engagement ceremonies to great restaurants and beyond, the kingdom of special Gable boxes. Packaging companies charge a high amount for high-quality and customized triangular boxes; This requires a change, and perhaps cheap and low-quality ready-made Gable boxes are not what you will solve.
So what to do?
I know what I'm doing. What you can do is limited only by your own imagination. Why not make personalized triangular boxes at home, save packaging costs and still shake the market.
Here it is:
Buying high quality triangle packaging from top US packaging companies is definitely the best choice. However, in most cases it costs a fortune and takes a lot of time. The turnaround time is more or less per week and you cannot always wait a week.
For example, if you need triangular packaging on New Year's Eve and ordered in the last week of December, there is a chance that you will not receive the customized packaging, since it always takes 4 or 5 days.
Likewise, if you go to the prepackage option, you should know that it is cheap, but cheap. While buying your ready-made boxes at home much earlier than customized boxes and very affordable, it is also very ordinary.
If your crusade is to impress potential customers and persuade them to buy your stuff, you should know that you have failed before you start. You cannot tie a shark with a bamboo rod and braided fishing rod. Gable packaging is like an M16 rifle without bullets inside.
That's why I brought you the art of making triangle boxes at home. In this blog post, you will learn how to make creative triangle packaging solutions at home.
Click Here : Sleeve Boxes
Material
Items you need to make gable boxes at home:
Cardstock of your favorite color
Bone folder
Scissors
scale
Double-sided tape or glue
Ribbon
process
Here is the step-by-step process you will follow to make Gable boxes at home:
Get the template - you may know that most of the special boxes of the print job are based on templates. You don't need to consume your brain cells to find plans for your genius packaging. All you have to do is find and download the most suitable template online.
Print the template on your card stock - There are many ways to bring the template to the card stock. You can use butter paper to print the template, draw it by looking at the instructions and the template, or use a printer to print on cardstock.
Size matters - Most of the templates are small and you should change them based on the size of your packaging. The template you received is always a small box; Use the ruler and other options provided by computer programs to adjust the size and get full length, width and height. Make sure you know the required dimensions. For example, if the size of your intended packaging is 8 ”x4” x6 ”, your template cannot remain as 4” 3 ”x3”. After downloading the template, you need to change the dimensions.
Cutting - Remember that you must use scissors and a scale to make sure you cut the correct size. Otherwise, you can get bent or wrong angles and a very raw cut, which is not very suitable for your purposes. Cut the card stock according to the required size and template.
Shaping - Let's not forget that a Gable box is actually a box that locks on the right and left sides, and therefore has a mechanism that you need to adapt properly. To make a Gable box, you need to properly cut the card stock to ensure that the right and left sides are locked in the main part of the box.
Click Here : Party Boxes
To do this, use the scissors and bone folder. When the stencil is cut properly, use the bone folder to remove the streaks. Then fold the paper along these lines to make creases and all four sides of the box.
Gluing - After you've thrown all the lines and making famous triangular holes to create the handles on the top of the box, it's time to properly glue all the edges to finalize the box. Apply glue or double-sided tape to the edges of the box to glue one wall to another until you get a square or rectangular box.
Bottom - The bottom should be a 45 degree piece of cardboard sticking out. Apply glue to the right side of this piece of cardboard and stick it to the larger lid. Repeat the process with the remaining two wings. This creates an automatic base. You will now be able to send your boxes in a flat form and the recipient will be able to combine them with a single press.
For more information visit ouer wesbite Thecustompackagingboxes.com


 15883
15883