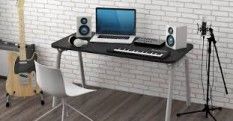
You need proper resources and a planning guide on how to make a recording studio in your room. Learn to set your music recording equipment like a pro.
For every musician, it is important to set up their recording studio. Recording requires proper equipment and know-how. Those who are just beginning with their music career shall look thoroughly to all the requirements, tips and tricks, or does and don’t to set up a recording studio in a room. We know that affording a separate studio won’t be feasible for the newbies and so, learning how to make a recording studio in your room makes more sense. Here is your brief guide to kicking off your music journey.
STEP 1: Choose a room for your recording studio
The first step in how to make a recording studio in your room is to choose the best room for placing the set-up. An average house has at least two to three rooms. You can occupy one for the studio. Here is how you can make your decision:
- Choose a bigger room for better functionality. It would allow you a bigger space to employ more musicians, music recording equipment, and devices.
- A room that has a silent space is better because while recording you may not want your music pieces to be humored with car noise, your neighbors fighting, or other noises.
- Select a room with hard flooring as you want to lay down your heavy instruments.
- A large room with a higher ceiling will do the job just fine.
STEP 2: Clear out the chosen room
After selecting the room, it is time to clear the space by getting rid of all the clutter. Clear off all floor space, take everything off the walls for better sound. If you cannot remove everything, try to clear off the things that can be.
STEP 3: Try to add acoustic treatment
Acoustic treatment is the process of improving the acoustic properties of a room, mainly for recording or mixing music. This process makes the surrounding neutral and sonically pleasing that is suitable for a studio set-up.
STEP 4: Arrange your workstation according to your convenience
Now that your studio is done with the set-up, it is time to add some gear and start recording. If you are willing to invest in a good table and chair for your workstation you can. However, any desk and a comfortable chair lying around your home would work for the time being.
STEP 5: Arranging the recording studio
Even though, if you are beginning with music recording equipment, recording, and mixing, it is an ideal choice to have two working stations, a desk or mixing area for the engineer, and a recording area for the musicians.
The later steps require you to attach all your gears and positioning the monitors. For further information, you can also look for relevant articles and blogs guiding you on how to make a recording studio in your room.


*********0@gmail.com
The mariachi is a traditional Spanish musical genre that originated in the southwestern United States. The musicians, who clad themselves in colorful costumes and handcrafted instruments, are known for their intricate and emotional performances. In recent years, mariachi music has become popular in Miami, where it is used to add a festive and authentic element to parties and other events. Javier Perafan