
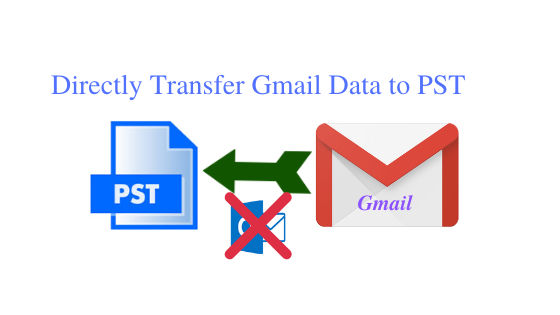
Are you in a need to export Gmail to PST without Outlook? Read and discuss the best and versatile way to transfer Gmail data in PST file. You can find the simple way of moving Gmail mail to Outlook Data File easily without using Desktop Outlook.
" title="YouTube video player" frameborder="0" allow="accelerometer; autoplay; clipboard-write; encrypted-media; gyroscope; picture-in-picture; web-share" referrerpolicy="strict-origin-when-cross-origin" allowfullscreen>
Are you in a need to export Gmail to PST without Outlook? If yes, then you are on the right page because in this blog we are going to discuss the best and versatile way to transfer Gmail data in PST file. You can find the simple way of moving Gmail mail to Outlook Data File easily without using Desktop Outlook.
Emails are not just a preference, it is the most important part of any small or big enterprise to connect with each other. And we know that Gmail is a giant email web-client used by millions of users across the globe. The reasons behind Gmail having a large number of users is, it provides free account and fast. Also, it provides a substantial quantity of cloud data storage space.
But we forget that nothing is safe when it comes to internet (cloud). Due to this, many users prefer saving the data locally. This could be efficient enough if we can get our data viewed and manipulated in Offline mode. If you want to access Gmail data in offline, the best solution is to export Gmail to Outlook Data file.
Outlook file format is taken into account as Outlook offers a good email management service. This email client provides various features to manage mailbox data such as emails, contacts, journals, notes, etc. With these functions, you can easily save the Gmail data in local system for lifetime. But is it possible save Gmail data in Outlook data file, if Desktop Outlook is not installed on the system. Lets’ find out.
How to Export Gmail to PST Without Outlook?
There is no direct method that can export Gmail data to PST without the use of Outlook application. But it is possible with the exceptionally amazing utility known as SysTools Gmail Backup Tool. This application is very much reliable to migrate Gmail data into PST format. There are much of facilities included in it for smart data download. And with the simple and friendly user-interface, you can easily export Gmail to PST without Outlook installation.
Gmail takes good care over the security of your data. Thus, you will have to grant permission to the application for easily accessing the Gmail account. To do this, you need to generate an App password and use it to sign in to the application.
Steps to Export Gmail Data to Hard Drive
-
Download and launch the software and then provide the credential for the Gmail account.
-
Select the PST file format to backup Gmail data.
-
Click on Browse button to select destination for saving exported file data.
-
Click on Start button to begin the download process.
Do you know how to generate an app password in Gmail account. Move downside to know the process step wise. The app password option is visible when the two-step verification option is enabled. Do the process through the below process.
-
Sign to your Google account, then go to Manage your Account Setting.
-
Move to Security tab. Scroll down and navigate to Two-step verification option.
-
Enable the option providing your Gmail credential and phone number.
-
Then, click on App Password option.
-
Enter your Gmail credentials to Generate Application Password.
-
Click on select app and choose other and enter the name of the tool.
-
the window pop-up shows the App password, save it at a known place & click on Done button.
-
Use this App password to login the Gmail Backup tool.
Some Additional Features of Software
-
This software gives an option to create backup in different file formats like PST, EML, MSG, and MBOX. The exported Gmail PST file is supported by MS Outlook 2019, 2016, 2013 and all the below versions.
-
It is capable to maintain folder hierarchy. This means after the exporting process is complete, the folder structure of the resultant data file is same as of Gmail account. Also, this process prevents data loss during data extraction.
-
For uninterrupted downloading of Gmail emails, this software offers an option to pause and resume the task while exporting process.
-
This software offers an option of incremental email backup. This option will export only the new data items on the computer. This is possible if you have taken backup of the same Gmail account earlier on this system with Gmail Backup Tool. In short, instead of saving entire data again, it exclusively backs up only the new Gmail items.
-
It also gives you an option to Delete After Download that clear emails from Gmail server after archiving the emails locally.
-
Gmail Backup tool provides the facility to download Google contacts into standard VCF 2.1 and Calendar data in ICS format. In addition, there are two different email filtering options:
-
Select Folder: You can use this feature to Export Gmail Folders to PST in a selective format. Only the selected folder will be backed up.
-
Email Filter: This feature can help you filter the Gmail email data on the basis of date. It includes a From and To constraints to define the begin and end date respectively.
These were some features that let you perform the Gmail data migration efficiently to PST format without Outlook intervention. In case you want to export Gmail to PST using Outlook, you can find the process in the upcoming section.
How to Transfer Gmail Data to Outlook
If you have any version of Outlook installed in your system, then it is easy to forward the Gmail mailbox to Outlook. If you don’t, install one of your concern. The latest version of Outlook in MS Outlook 2019. In this article we are up with the solution to transfer Gmail data to Outlook using 2013 version. The below process is compatible on 2016 and 2019 Outlook versions. So let us go down to the process
Steps to Forward Gmail Mailbox to Outlook
-
Launch MS Outlook 2013.
-
Go to File menu and move to Info tab.
-
Click on the Add Account option.
-
This opens Add Account Window. Select Manual setup or additional server types setup. Click Next.
-
Now, on the Choose Your Account Type section, select POP or IMAP option. Click Next.
-
Enter Your Name, Gmail Email Address under User Information.
-
Below Server Information, choose account type: IMAP / POP.
-
Enter Incoming mail server. For IMAP: imap.gmail.com; For POP: pop.gmail.com.
-
Enter the Outgoing mail server (SMTP) as smtp.gmail.com.
-
Under Logon Information, Enter you Gmail Username and Password.
-
Click on More Settings option.
-
Move to Outgoing server tab. Enable My outgoing server (SMTP) requires authentication option. Also, choose the option to Use same setting as my incoming mail server.
-
Move to Advanced tab and define mail server port numbers and encryption modes.
-
Add 993 value for IMAP or 995 for POP type. Use SSL encrypted connection.
-
Type 465 for SMTP port number and use SSL encrypted connection. Click on OK button.
-
Click on Next button to test the configuration. Once the configuration is successful, click on Finish button. This will close the configuration setup.
Restart the Outlook application to view the Gmail mailbox in Outlook folder pane. This process may take some according to the size of data in Gmail. After configuring, you just have to extract email data from the default location of Outlook. The default storage path of Outlook data is C:\Users\admin\AppData\Local\Microsoft\Outlook\
You can also, use the Outlook Export facility to export Gmail to PST with selected data.
Conclusion
Gmail is a well managed email web client. Outlook on the other side has similar features and offers offline work mode. In case you wish to have your Gmail data in PST, as it holds the file structure intact, you can configure Gmail in Outlook. If you don’t want to perform the configuration and get your Gmail data in Outlook file format, read the article to learn how this is possible. This will guide you on how to export Gmail to PST without Outlook.


 33570
33570

*********dhuri@gmail.com
Get amazing ZOOK Gmail Backup Software to transfer Gmail messages to multiple file formats and webmail apps. Users are capable to save Gmail emails to PST, EML, MBOX, MSG, PDF, HTML, Doc, CSV, ZIP Zimbra, MHT, XPS, RTF, EMLX, etc. Directly Import Google Mails to Outlook, Thunderbird, Lotus Notes, Office 365, Rediffmail, Yahoo, Windows Live Mail, IBM Verse, Amazon Workmail, Exchange Server, Hosted Exchange Server, and more. Read More Info,Visit Here:- https://www.zooksoftware.com/gmail/backup/