
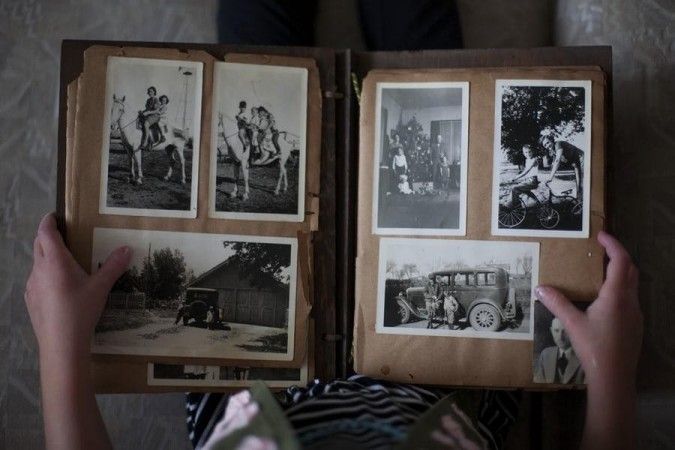
If you have an extensive collection of old photographs, you're probably thinking about getting them digitized as soon as possible.
No matter how much you protect your photos, they still deteriorate over the years, and will only become more difficult to restore as more time passes. What's more, storing boxes of old photos is not something most people want to deal with, especially when having them in a digital format is so much more convenient.
Some people finally decide to type in "photo scanning service near me" into Google search, but others want to try to do it on their own first. Either way, it’s important to note that scanning photos is but one part of the process. After scanning, you’ll have to crop, straighten, rotate and color correct your images to make them look their best.
Most photo scanning companies will do this for you, but if you decide to scan photos yourself, here are some tools you can use.
Free Tool: Gimp
Gimp is a photo editing tool that's completely free to download and use. Although it might not be as robust as Photoshop, it offers a range of useful features, and can sometimes do the job just as well, saving you a lot of money.
While the basic features of Gimp aren't suitable for cropping, straightening, and opening multiple scanned photos, there are plugins that you can use to make the task much easier.
One of such plugins is the Divide Scanned Images plugin, which allows you to not only select multiple photos but also to split the photographs into different files.
Using the plugin, you can just set the parameters, such as the maximum number of pictures on any given page, and allow the software to do its thing. It should manually separate the files and save them in a pre-determined folder.
For this method to work, you must make sure that the scanned page of photos has a consistent background that the software can identify. For instance, photographing your album with a camera might be difficult because the inconsistent background will confuse the software and make separating the photos impossible.
What's more, the photos mustn't touch so that they can be separated and you don't end up with weird-looking files containing two or more pictures.
Once you have the files ready, make sure that they are consistent and that no errors are present. If you notice issues, go through the process again, and consider re-scanning your pictures, as the background is the most likely culprit.
Then, edit each one, cropping it, straightening it manually. This process will take time, but it's the only way to ensure that you get consistent quality and that the digital images are actually usable.
This is a free software tool, so you shouldn't expect miracles, especially in terms of image editing possibilities. If the scans are inconsistent, you will probably have to live with the results that you get, but if you just want a free option, this might be your best bet to preserve the images, even if it's not an ideal solution.
Paid Tool: Photoshop
Anyone who's ever had to edit photos on their computer has probably heard of Photoshop. It is the go-to software for professionals in a wide range of fields, and it is also used by everyday people who want more control over how their images look.
One drawback of Photoshop is the price. If you just want to crop and rotate a small quantity of images it may not be worth it to you.
Another drawback of using Photoshop is the steep learning curve. Because there are so many advanced features, it isn't beginner-friendly, and even doing relatively simple tasks would probably require you to spend hours watching tutorials online.
Still, if you already own Photoshop and want to go this route, it might be a bit easier than when using Gimp, and you might even have a bit more control over the results.
Photoshop actually has a built-in feature called "Crop and Straighten Photos," which does exactly what it says. It takes your scanned picture pages, automatically crops each of them, and then straightens them so that they are not uneven or crooked.
When you have your initial scans, you will be dealing with a single file of each page. Open that file on Photoshop, click File at the top, then Automate, and then select the Crop and Straighten Photos option.
The software should then do its job, automatically recognizing the images on the page, separating them, cropping them, straightening them, and opening them for you to view.
Occasionally, you may find minor imperfections on the photos, which is when you will need to use the manual crop function to fix the issues yourself.
Paid Option: Hire Professionals
While both of the previously mentioned options are viable, each of them has one significant drawback: they are very time consuming. If you only have a few photos to scan and process then doing it yourself is a great option. However, if you have hundreds or even thousands of photos to be digitized, your best option is to find a professional photo scanning company.
The benefits of using a photo scanning service are many. They have high end equipment and the necessary experience to digitize your photos, crop, rotate and color correct them to ensure you receive the best possible quality images of your precious memories. Prices are better than ever and you won’t have to spend countless hours perfecting the process and performing the tedious work yourself.
So, instead of looking for the software tools listed above, it might make more sense to type in "photo scanning service near me" into Google and rest assured that your precious memories will be in good hands.
Author Bio:
Brandon Harris is the owner of Smooth Photo Scanning Services, one of the leading photo scanning service providers in New Jersey, providing slide scanning services, vhs to digital service, conversion of CDs and VHS tapes to DVDs, and more. Prior to that, Brandon owned and operated a small bakery. Other than working to grow and improve his business, he enjoys spending time with his wife, daughter, and family.


 74682
74682