
Before the chair is delivered, the trucking company will call to make final delivery arrangements. We always have the delivery company call 24 hours in advance to make sure the delivery is convenient for you.
Your dental chair is the heart of your operatory. It’s the first thing patients see when they walk in, which leaves a lasting impression, and it’s also used as the main workbench for you and your assistant. Considering that the dental chair is one of the utmost essential pieces of equipment for your practice,there are important factors to consider when shopping for a new dental chair. Here are 3 basic, but essential tips when buying a dental chair.
Implement Every Practical Technology. The article points out that dental technology is constantly in a state of rapid flux, so it makes sense to build in all technologies currently available to ensure longevity of your equipment. Dental chairs are a large investment, so you don’t want to buy a chair today and have it become obsolete tomorrow.
Appearance Has an Impact. As stated above, the chair is the first thing your patients see when they walk in and it could really have a lasting impression. We know people develop their initial reactions with their eyes, so if they see a high-tech new chair, their opinions and acceptance to treatment may be more positive.
Spending eight hours bent over a chair can impact your daily productivity as well as career longevity. DPM recommends that the chair adapt to you ergonomically, so you don’t have to adapt to your chair. And dentalsalemall.com couldn’t agree more, which is why we have long been committed to providing ergonomically-friendly thin back chairs.
Before the chair is delivered, the trucking company will call to make final delivery arrangements. We always have the delivery company call 24 hours in advance to make sure the delivery is convenient for you. Once the chair is delivered, you can begin installation:
Remove top of shipping carton: Your dental chair will ship in a carton secured to a pallet. We make arrangements with the trucking company so they will deliver the chair into your office for you. The carton is typically secured with plastic straps to the pallet. Cut the straps with a scissors or sharp knife. Once the straps are removed the cardboard should just lift straight up.
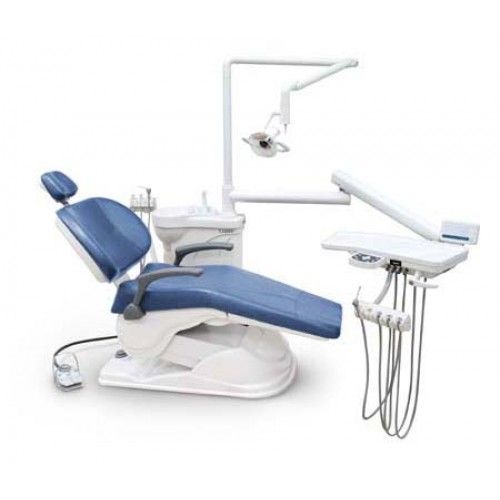
Inspect chair: Once you’ve got the cardboard off you can clearly see the chair as it rests on the pallet. Inspect the chair for any signs of damage and inform your dealer immediately if you see anything untoward. The way that chairs are packaged makes damage extremely rare, but it can happen.
Remove retaining blocks from base of chair: The chair will typically be anchored to the pallet by wooden blocks that overlap the base of the chair and which are bolted to the pallet. Using a socket, crescent or open-end wrench, unscrew the bolts and lift off the retaining blocks.
Slide chair off of pallet: While heavy, the chair should slide fairly readily off of the pallet. It’s best to have two people for this task. Always push with your legs (bent at the knees) and be sure to push as close to the base of the chair as possible (for the best leverage and to assure you don’t push on a movable part).
Attach back rest link pin to drive shaft/cylinder back link using a 1/8” hex wrench: The back ships unattached to the drive mechanism (which controls back movement) so that it can be folded down to more easily fit into the carton. There is a hook on the drive linkage which will attach to a bar at the bottom of the back rest. This hook is secured with a set screw.
Attach seat frame rail using provided bolts: The seat frame is bolted to the chair base as illustrated:The bolts are inserted through bushings forming a hinge which allows the seat to be easily lifted for service and cleaning. This also allows for coordinated seat and back movement.
Attach upholstery to seat frame: The upholstery ships anchored to a steel plate (toe board). This plate secures to the seat frame using four large thumb screws.
Insert headrest: The headrest can be inserted into a slot in the middle of the backrest. There is a line on the headrest, this represents the maximum safe distance the headrest should be extended. The vertical tension on the headrest can be adjusted using the two button-head phillips screws on either side of the slot. Tighten these screws to increase tension, making it harder to push the headrest down (and so it holds the selected height).
Plug in and test for function: The chair should be connected to a 110V grounded outlet. Test each control individually – base up, base down, back up, back down, auto return, and any programmed positions. Use the foot control as well as any back switches or remote touch pads for all functions (one at a time). If your chair is programmable, this is also the time to program any custom positions you wish.
If you have any problem in choosing dental chair including portable dental chair, please feel free to contact us at dentalsalemall.com


 2114
2114